Copyright
2009 Thomas Penrose
Replacing Woven Paper Cord Seats on Danish Modern Chairs by Neils Møller, Hans Wegner, and Other Designers: PAGE 2
| PAGE 1 -- PAGE 2 -- PAGE 3 -- PAGE 4 -- PAGE 5 -- PAGE 6 -- PAGE 7 |
|
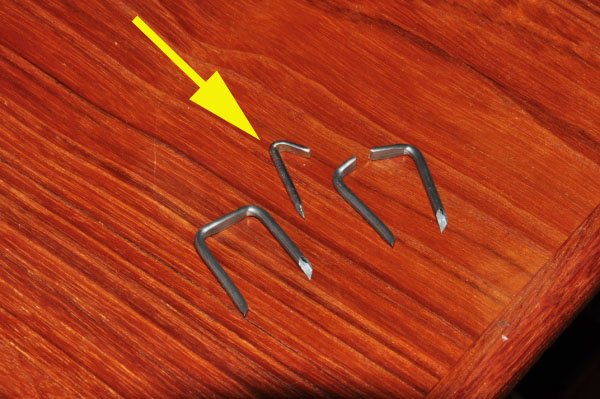
| A genuine Danish "L" shaped upholstery nail looks like the one indicated with the yellow arrow. Some of the "L" nails you can buy are are actually electrical wiring staples that have been cut in half, as shown in the image above. These nails typically have thicker shafts, and are harder to pound into the original holes. I find genuine "L" nails to be easier to work with. |
|
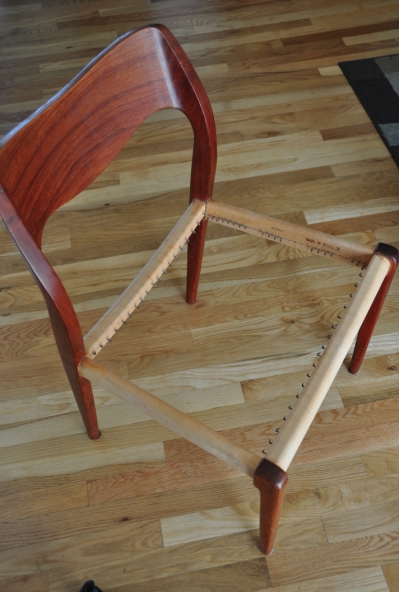
| With a little help from a knife (serrated knives work well for sawing through the old cord), you can remove all of the cord material from the chair once the nails are loosened. I do not actually un-weave the paper cord, but just cut the top of the seat so that large sections of the cord can be pulled off the nails at once. I do unwrap the spacer wrappings on the front and back rails of the chair though, since attempting to cut them might damage the wood rails themselves. NOTE: For the front and the back rails of the chair, there needs to be an ODD number of nails, in order for the weaving of the seat to work correctly. Most Moller dining chairs have 19 nails on the front and the back rails, although some have 17. |
|
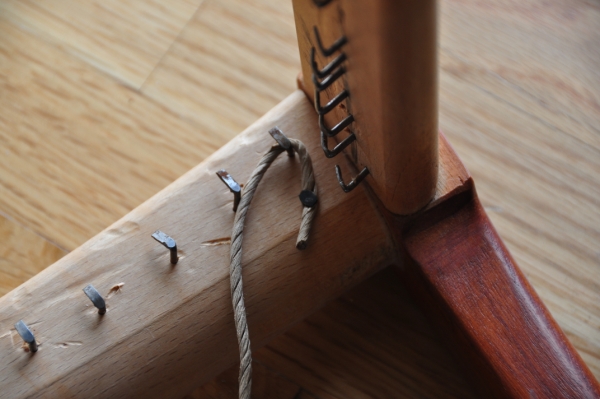
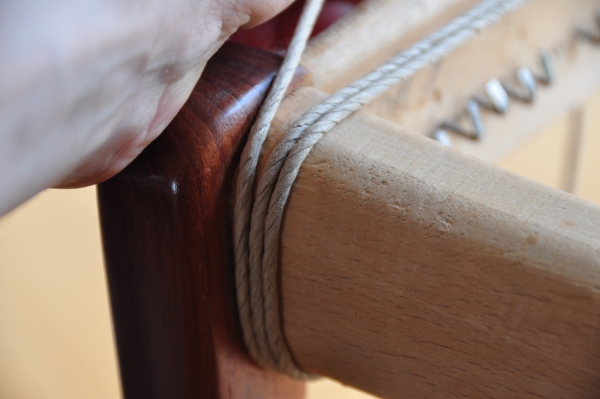
| To start the process of weaving the chair, you will be doing the Front-to-Back weaves first. Start with the lefthand side of the front of the chair, as seen above, and use a cut tack to attached cord from your roll of replacement cord, and wrap it up and over the first nail head on the front rail, as in the image. Then pull it under and up over the top of the chair's front rail, and pull the cord back toward the back rail of the chair, as seen in the next image. |
|
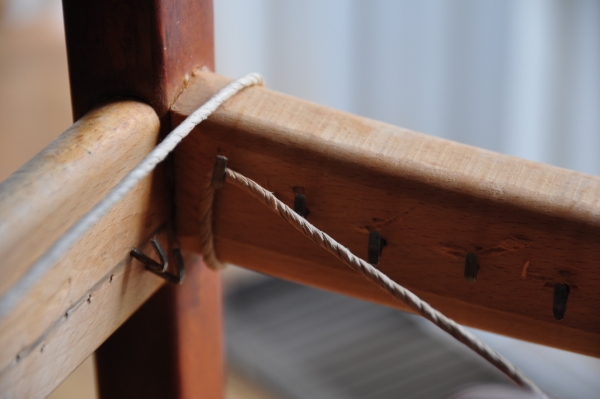
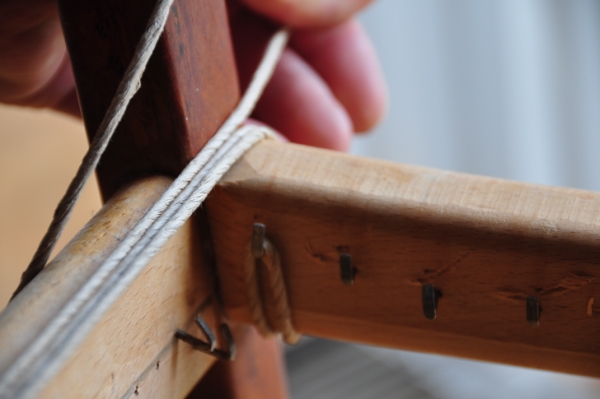
| In this image the cord has been pulled from the front of the chair, and up and over the back rail, and then caught on the first nail of the back rail, as shown. You will then pull the cord under the back chair rail, and then go up and over and back to the front rail of the chair, going over the top of the front rail to catch the cord on the nail, as seen in the next image. Make sure to pull the cord snuggly as you wrap, but you do not have to overdo it. The front-to-back weaves will also tighten up considerably when the side-to-side weaves are added in the end. However, at no stage should the weaving be hanging limply, or have have excess slack. |
|
| In this image, the cord has been brought back from the back rail of the chair, and wrapped over the front rail, caught on the same nail as before, and is now being pulled back toward the back rail of the chair again. |
|
| In this image, the cord has been drawn back to the back rail of the chair, and I am about to wrap it back under the rail, and catch it on the nail, as seen in the next image. |
| PAGE 1 -- PAGE 2 -- PAGE 3 -- PAGE 4 -- PAGE 5 -- PAGE 6 -- PAGE 7 |
Copyright
2009 Thomas Penrose |