

END
Copyright
2009 Thomas Penrose
Replacing Woven Paper Cord Seats on Danish Modern Chairs by Neils Møller, Hans Wegner, and Other Designers: PAGE 7
| PAGE 1 -- PAGE 2 -- PAGE 3 -- PAGE 4 -- PAGE 5 -- PAGE 6 -- PAGE 7 |
|
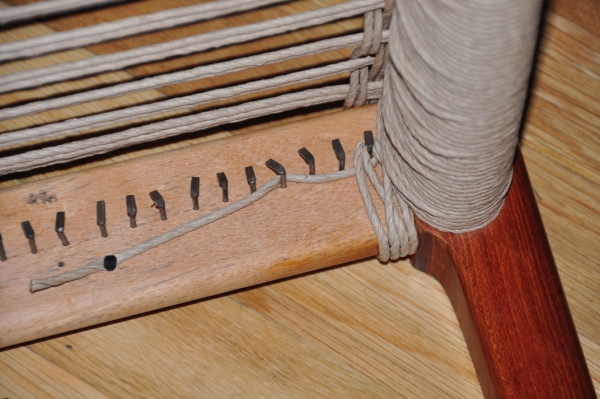
| In this image, the first two side-to-side wraps have been completely, and both are wrapped around the same nail, as seen in the image above. Typically, you use each nail for two side-to-side weaves. |
|
| I am now starting the third side-to-side weave, and will continue this process. You have to pay attention to make sure you do not make an error when doing the over/under weaving at this stage. Also, each time you complete a side-to-side weave, check it to make sure you did not make a mistake before continuing. |
|
|
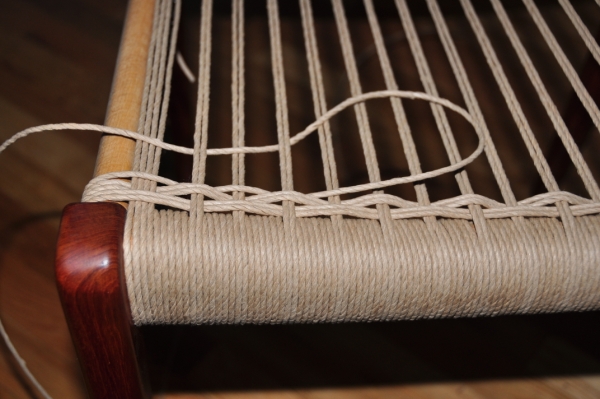
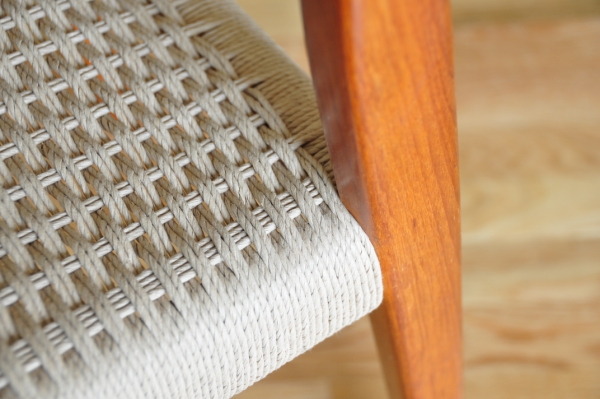
| The chair seat is a little less than 1/2 done at this point. As you do these side-to-side wraps, be sure to pay attention to how the cord is oriented on the underside of the the side rails. You can end up with a cord that improperly overlaps the cord next to it, and it is much easier to fix this if it is caught sooner rather than later. In the image below, you can see that the cord on the bottom of the side rail is smooth, without any lumps caused by twisted, overlapped cords. |
|
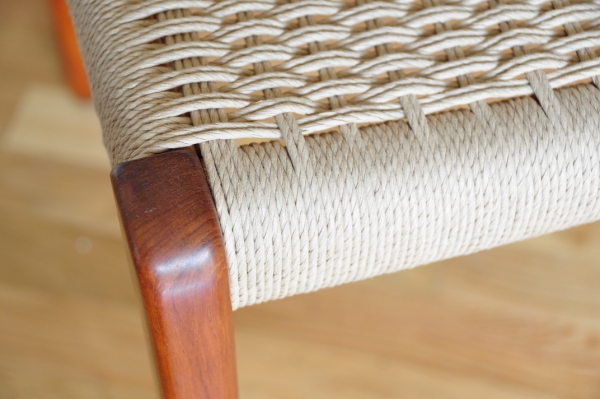
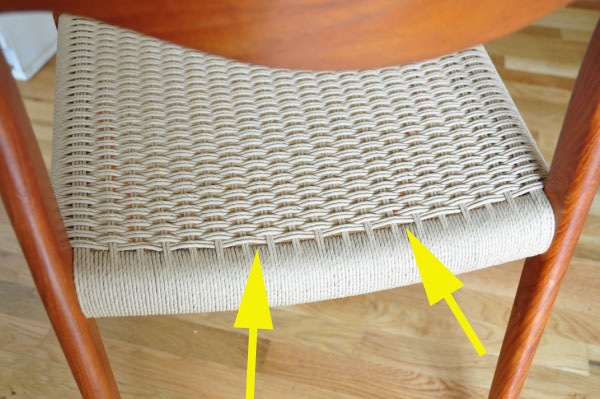
| This shows the completed side-to-side weaving, and how each nail is wrapped. You can see the final tag end of cord secured with a cut tack. You can also tuck this tag end under the other wraps if you wish, and secure it that way, which is how it seems to have been done at the J.L. MøllersMøbelfabrik factory. I opted to simply tack it in place. |
|
| A key to doing a good wrap job is to not have any of the wood from the chair's front, back, and side rails showing between the wraps. The wraps should be tightly packed against each other, so there is no wood showing between the cord. A non-serrated butter knife is a good tool for packing the cord tightly against each other, as well as to spread it apart so you can fit addtional cord into the space, to make sure it is tightly filled. |
|
| A common trouble area is at the back legs of the chair, where the side-to-side weaves meet the leg. The cord has to be very tightly packed into this area, so that it meets up against the chair leg, and none of the side rail is still showing. Doing the weaving in this area, as you run out of space to work with, is where you will encounter the most difficulty, and find the task moving at a much slower pace than earlier. |
|
| Also, take care that there are enough side-to-side wraps from front to back so that they are no large open gaps left between the rear rail and the final side-to-side wrap. You have to pack the cord pretty tightly against each other to accomplish this. |
|
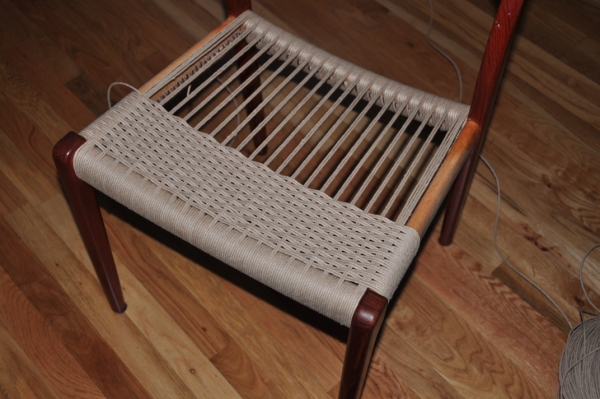
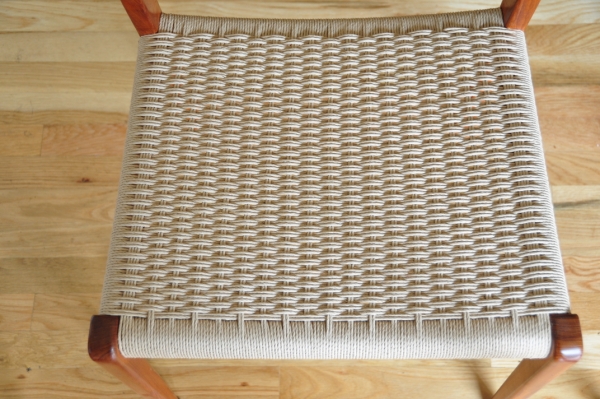
| An image of the completed seat of the chair. |
|
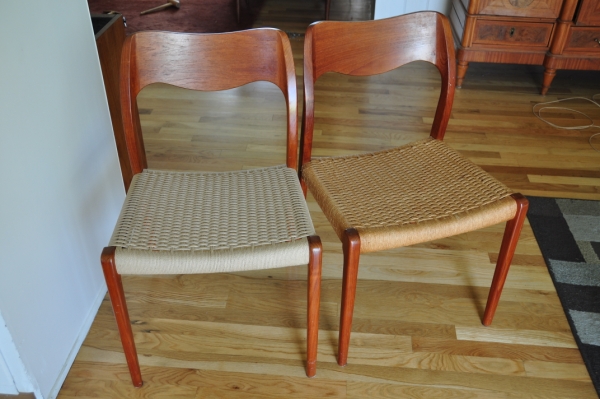
| A completed Moller Model 71 chair next to one that still has its original cord seat. With age the new seat will acquire the golden patina seen on the older chair. |
END |
| PAGE 1 -- PAGE 2 -- PAGE 3 -- PAGE 4 -- PAGE 5 -- PAGE 6 -- PAGE 7 |
Copyright
2009 Thomas Penrose |