|
|
|
|
Next, before
re-installing the brushes, put the motor back in position in the upper
half of the vaccum unit, and secure it with the four metal plates and
eight screws, as shown above. |
|
|
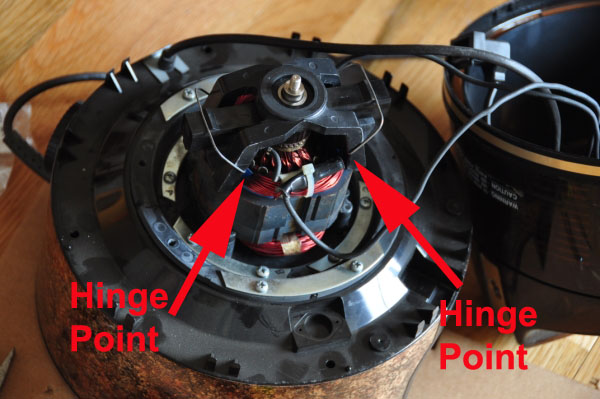
With the motor
secured with the metal plates, re-install the two brushes. If they are
significantly worn down or cracked, replace them with new ones. Take care
to re-attach the spade plug/wire to each brush, or the vacuum will not
work. ALSO, when you snap the wire Brush Retainer Clips
back in position, you need to make sure they have caught properly on the
parts of the Bearing Bridge Assembly that each of these wire clips hinge
from. Failing to do so could allow the brushes to come loose during operation,
resulting in damage or operational failure. |
|
|
|
|
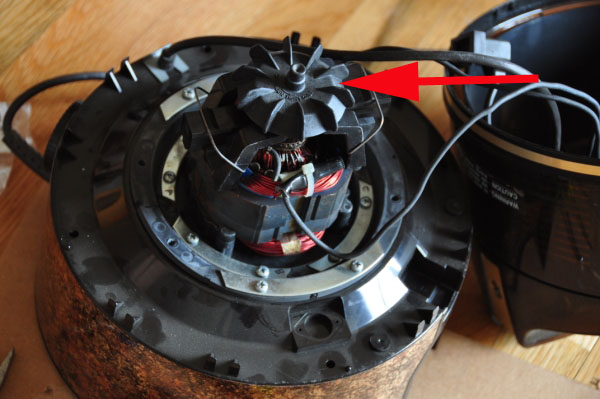
Next, install
the Rainbow motor's cooling fan, which installs by screwing on counter-clockwise.
DO NOT ATTEMPT TO TEST YOUR MOTOR AT THIS STAGE. PLUGGING IT IN
AND TURNING IT ON CAN DAMAGE THE FAN DISKS INSIDE THE MOTOR, AS THEY HAVE
TO BE HELD IN PLACE BY THE COMPRESSION THAT OCCURS WHEN THE UNIT'S SPIDER
IS INSTALLED, AND BOLTED DOWN IN THE FINAL STAGE OF RE-ASSEMBLY. |
|
|
Next, install
the white plastic motor shroud, taking care to not pinch the two wires
that come out from the motor. |
|
|
|
|
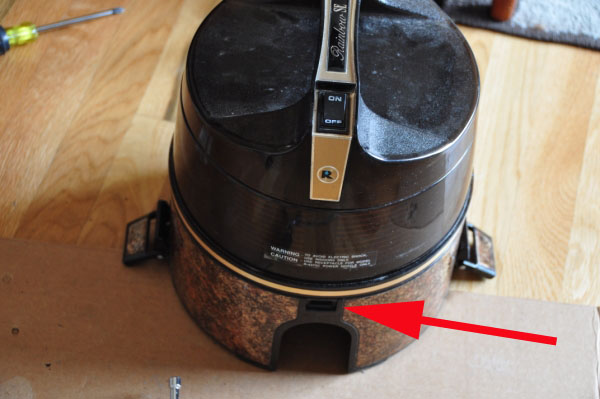
Next put the
two halves of the vacuum body together, being sure not to pinch any of
the wires, or having any wires in a position where they might rub against
the Motor Fan at the top of the white plastic motor shroud. You also have
to put the plug outlet for the vacuum's Power Nozzle back in position,
in the opening right above where the vacuum hose attaches to the unit
(see red arrow). |
|
|
| Next, use the
four screws to secure the two halves together. Take great care not to
strip the plastic when re-threading these coarse threaded screws. Do
not attempt to turn them if they do not turn easily. A trick
to orient them is to put the screws in position, then turn them counter-clockwise
until the threads drop in place, then try turning them clockwise to tighten
them. Try this until the threads line up and the screw can be turned easily
without stripping threads. DO NOT ATTEMPT TO PLUG IN YOUR VACUUM
TO CHECK ITS OPERATION YET. THE SPIDER MUST BE INSTALLED FIRST TO SEAT
THE FANS INSIDE THE MOTOR HOUSING. THIS LOCKS THE FANS IN POSITION AND
KEEPS THEM FROM BEING DAMAGED WHEN THE MOTOR SHAFT SPINS
|
|
|
|
|
|