|
| PAGE
1 -- PAGE 2 -- PAGE
3 -- PAGE 4 -- PAGE
5 -- PAGE 6 -- PAGE
7-- PAGE 8 -- PAGE
9 |
|
|
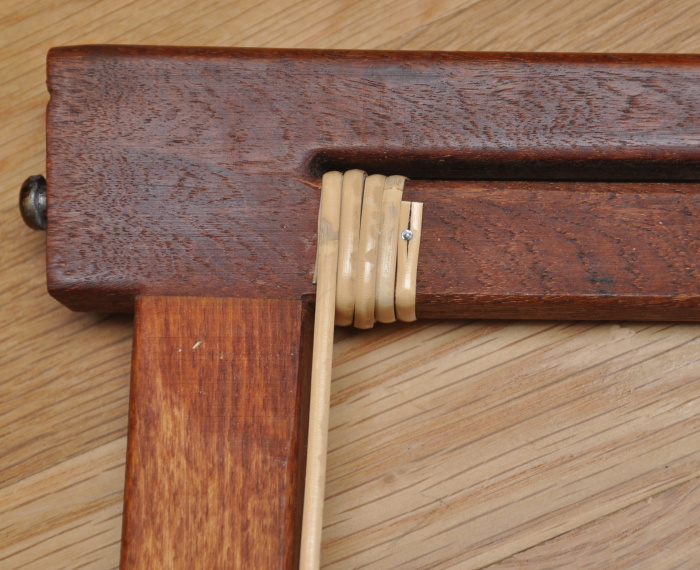 |
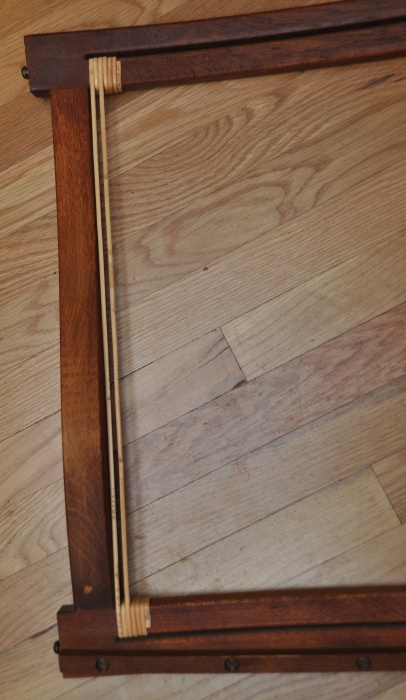
Once you have wrapped this end piece to create the four wraps seen in this image, with the loose end nailed in place in the same position seen here, you can pull the rattan strip to the bottom of the chair seat frame. |
|
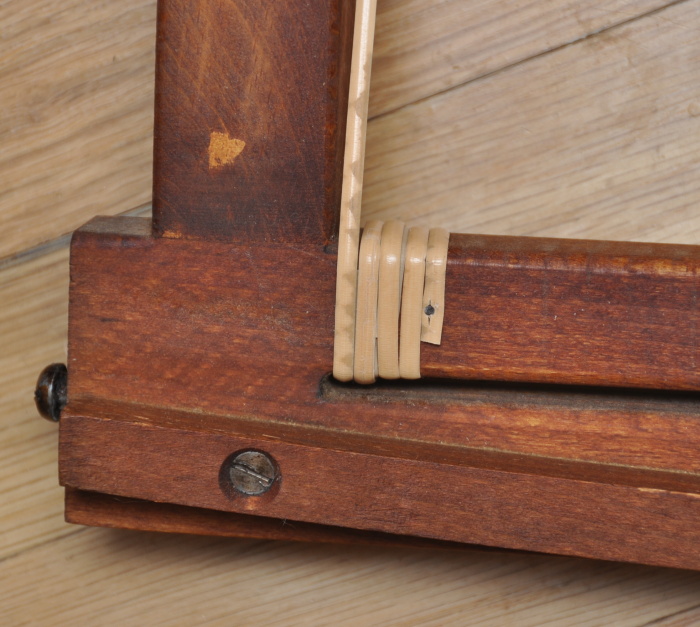 |
| At the bottom of the chair seat frame, you do the same four wraps, then nail the loose end in the same position that I have nailed it here. It is very important to have the number of wraps be the same as they are shown here, or it will mess up the layering of the subsequent wraps that go over these. You do not need to make an effort to pull this vertical strand extremely tight as you are wrapping it. If you get it too tight, it will be hard, or even impossible to do the horizontal weaving. As long as the warp strand is not sagging or flopping around, it is tight enough. You do however want the wraps to be very tight. It is the actual vertical warp strand that you do not want to stretch too tightly. |
|
 |
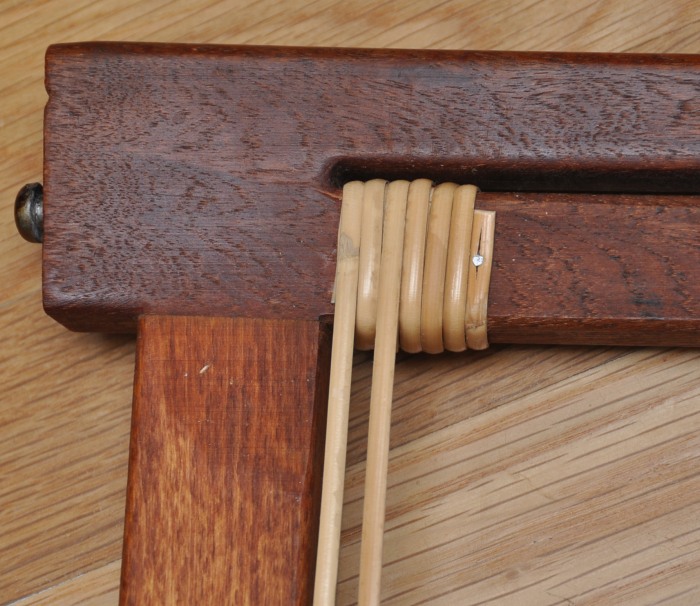
This shows the first warp strand on the left side of the seat frame. Next, you do a second warp strand, using the exact same method as the first one. However, as you can see in the next image, you start the second weave one wrap over from the first weave, so that there is a space between the two. Inspect the entire length of the warp strand for defects at this point, which might cause it to fail prematurely, and break. If you see a defect, replace it now, since you will not be able to do so very easily later on. |
|
 |
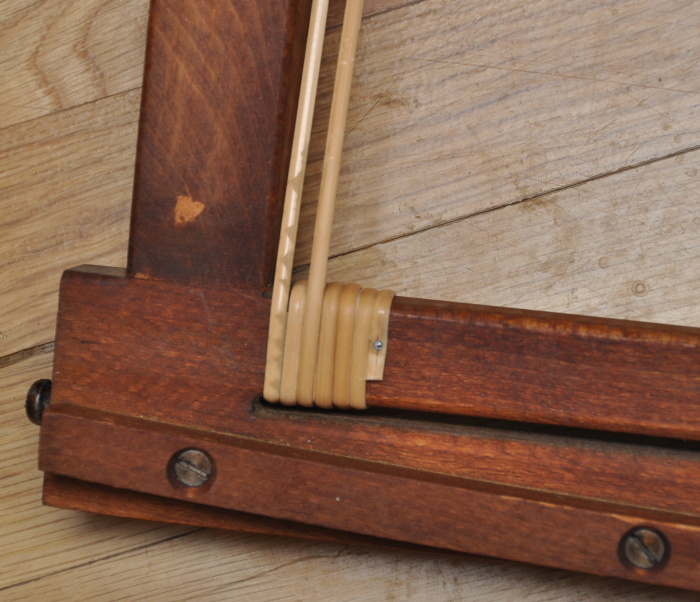
| In this image I have done the second wrap and nailed it in place, starting one wrap over from the first strand I put in. As you are wrapping the rattan around the chair frame, you need to be sure to check the back side of the frame as well, to make sure your wraps are tight and do not overlap or cross over one another. It is important to fix any mistakes before you put in the next wraps, since they will lock the prior ones in place, making them hard or impossible to fix without having to remove any subsequent wraps you did. This can be a lot of extra work and lost effort. |
|
 |
| I have repeated this wrap on the bottom of the seat back frame. Again, make sure to do the appropriate number of wraps, or it will mess up how many layers of rattan there are, so that there are not more or less than two layers. If you see any spaces between the wraps, you can use the back side of a butter knife to pack the wraps up against one another, so they are tight and neat looking. Again, be sure to check the back side of the frame to be sure the wrapping looks correct on that side as well. |
|
 |
This image shows the second warp strand completed, and nailed in place to secure it. |
|
|
| PAGE
1 -- PAGE 2 -- PAGE
3 -- PAGE 4 -- PAGE
5 -- PAGE 6 -- PAGE
7-- PAGE 8 -- PAGE
9 |
|
|
|